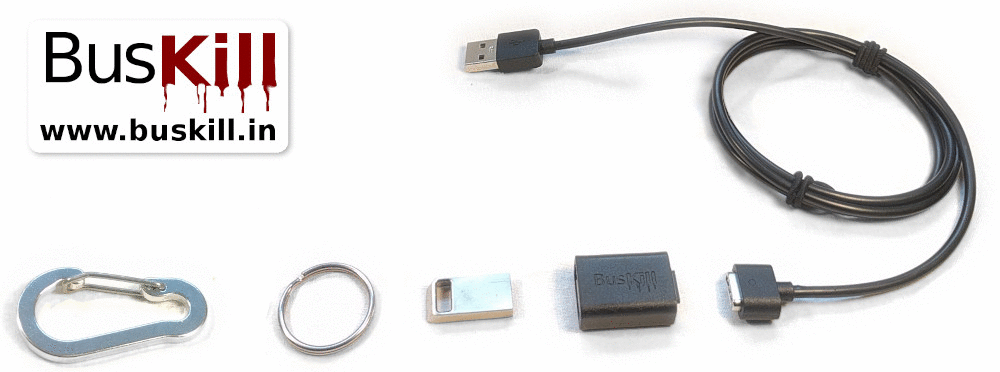
Assembly of components
This section will describe how to assemble the hardware BusKill cable prior to using it.
For information on how to use the BusKill cable, see Hardware User Guide
Step 1: Attach carabiner to USB drive
First, connect the carabiner (clip) to the USB drive.
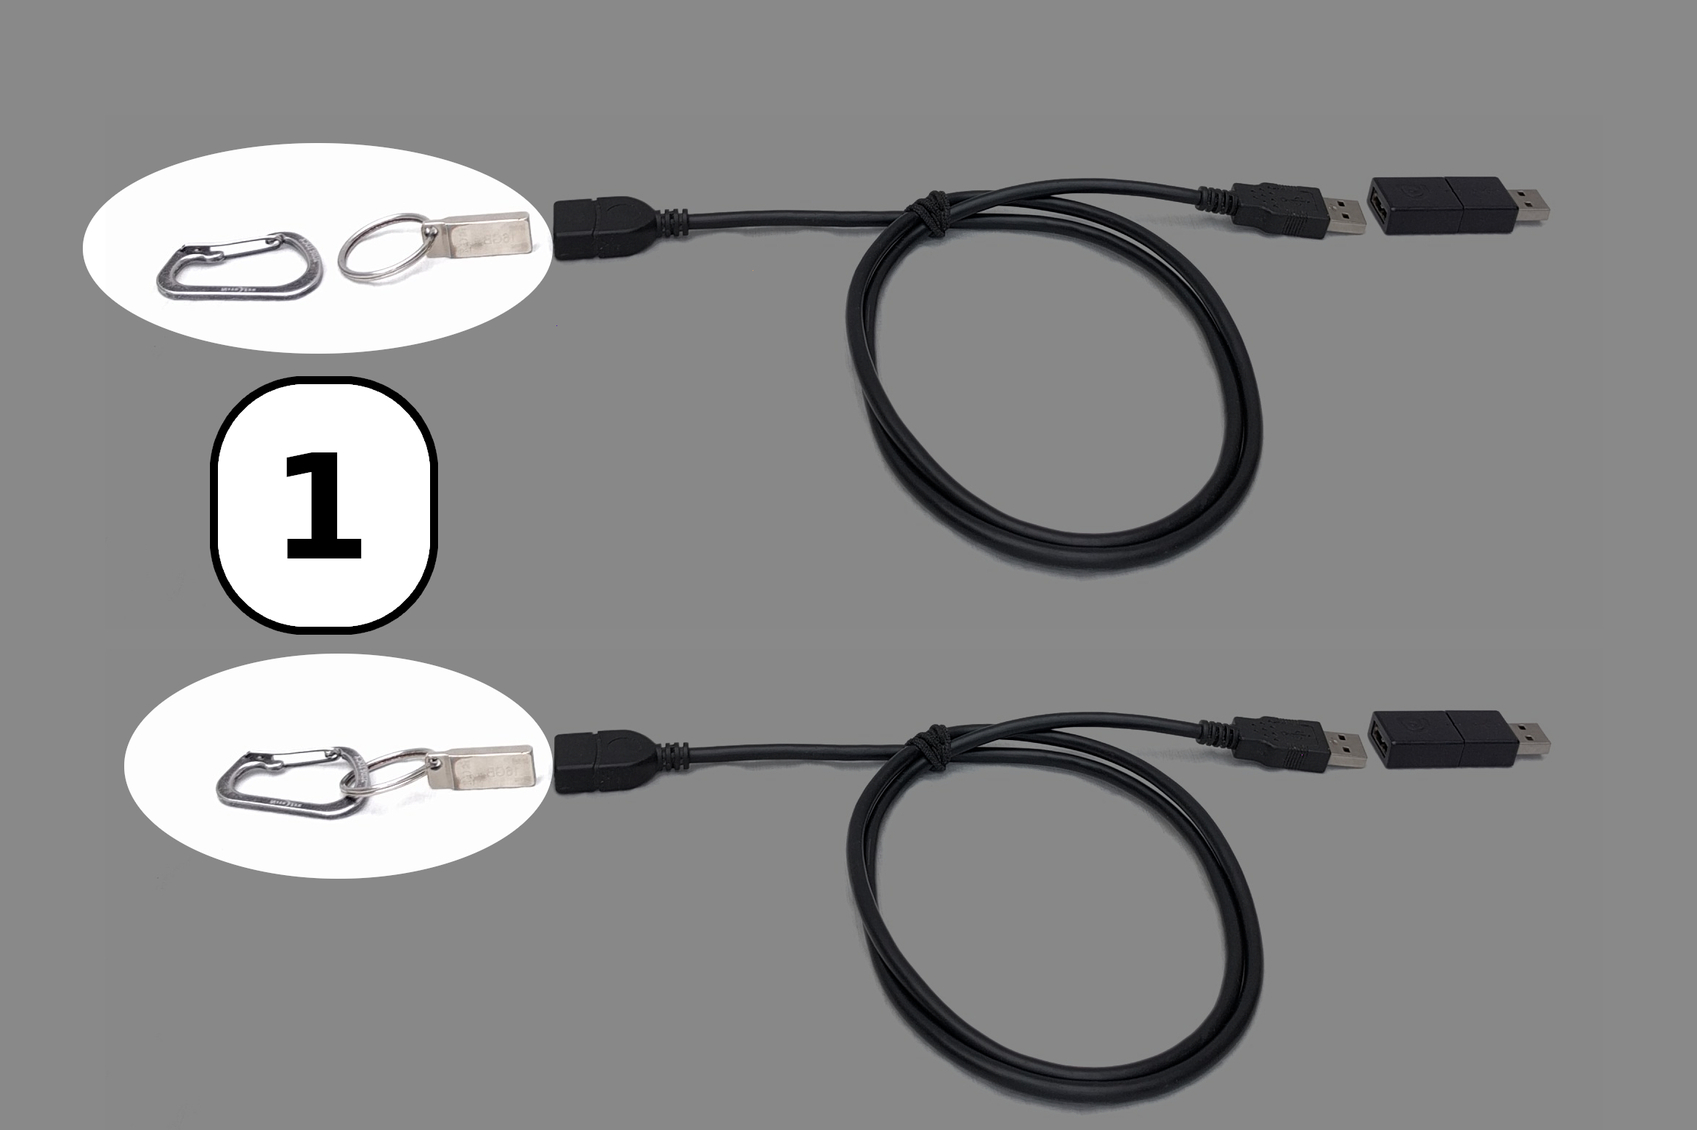
Step 1: Attach Carabiner to USB drive
Step 2: Plug USB drive into cable
Next, plug the USB drive into the female end of the USB extension cable.
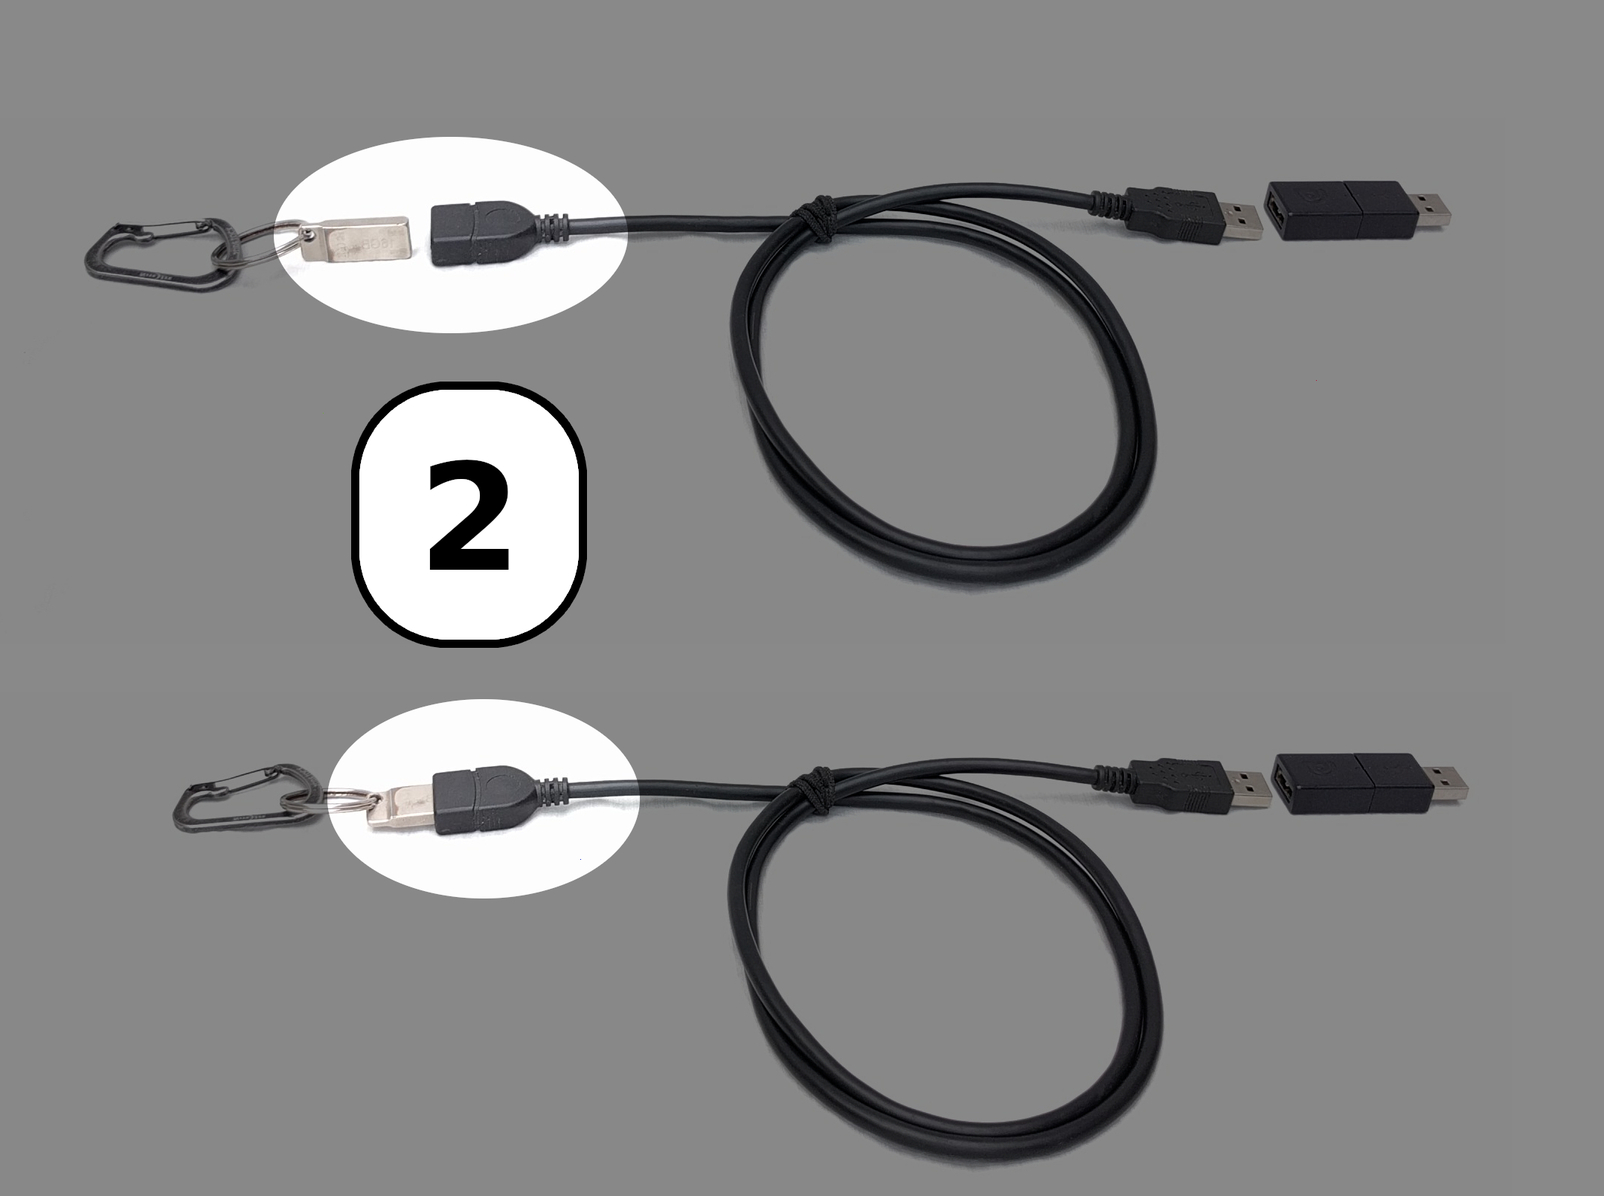
Step 2: Plug-in the USB drive into the USB extension cable
Step 3: Plug USB cable into magnetic breakaway
Finally, plug the the male end of the USB extension cable into the USB magnetic breakaway adapter.
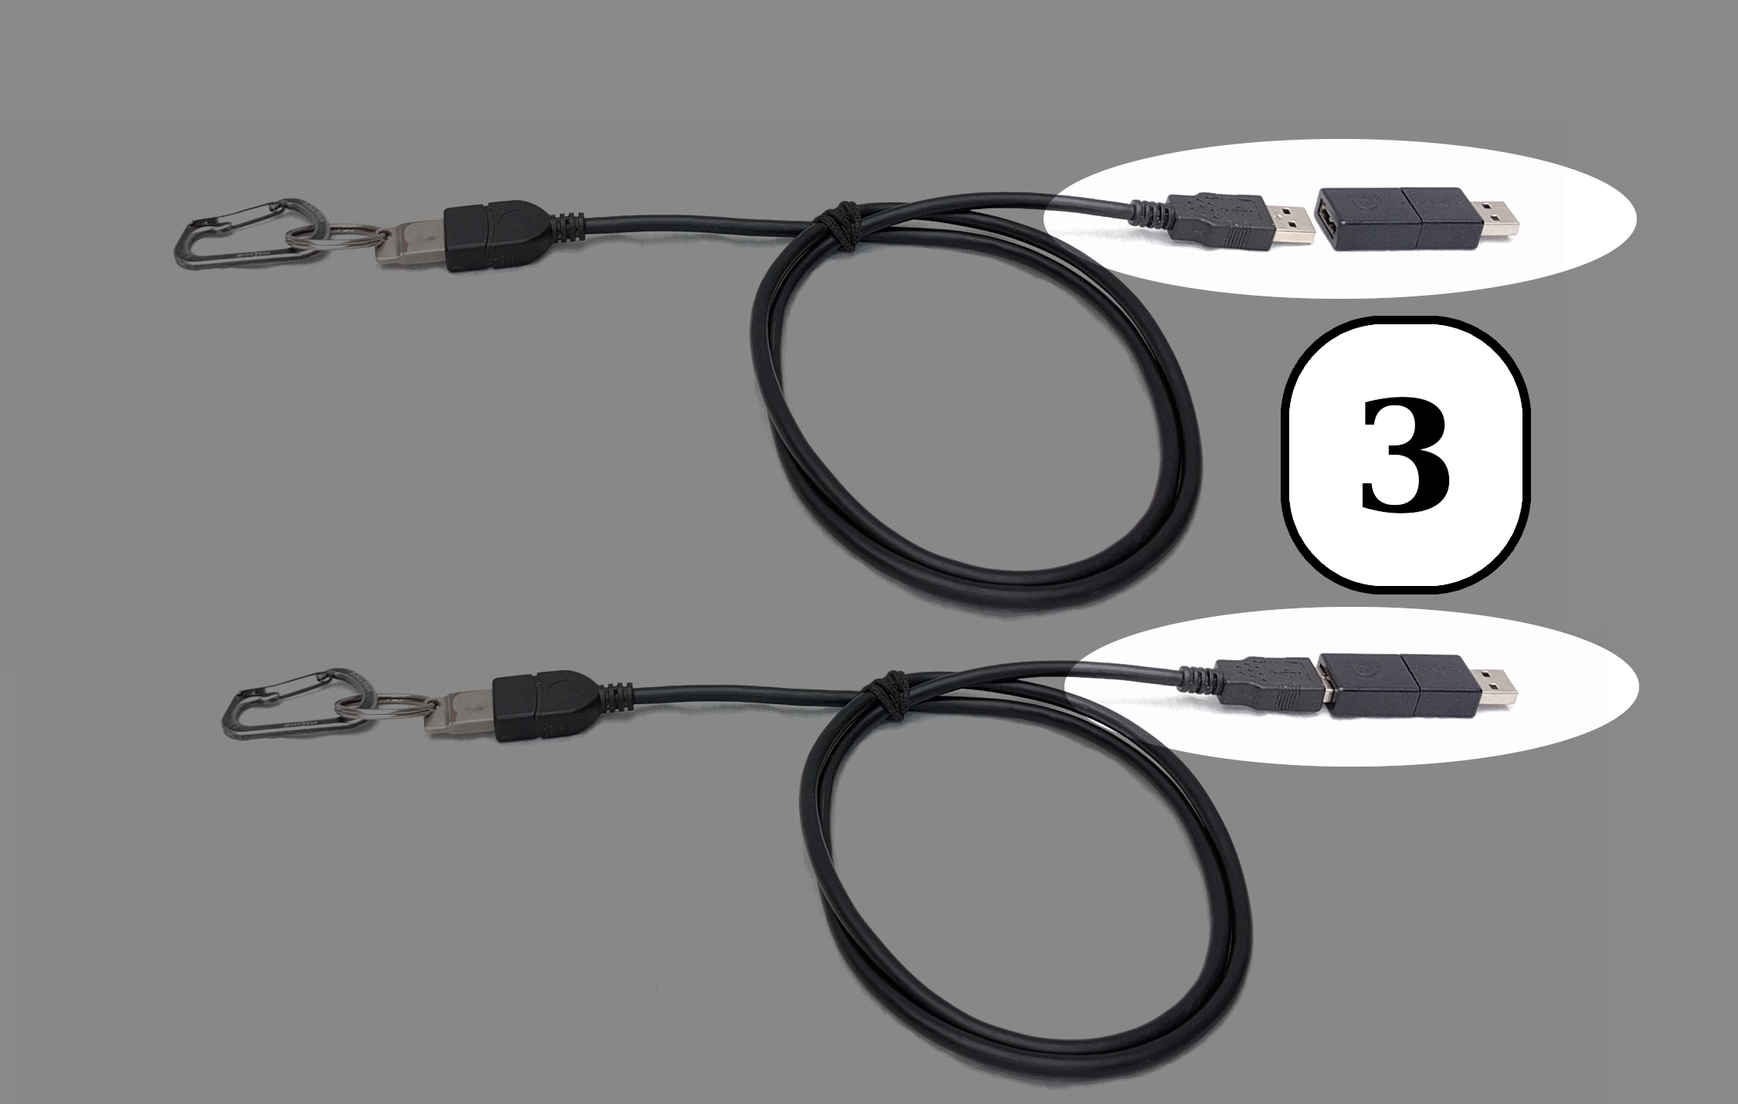
Step 2: Plug-in the USB extension cable into the magnetic breakaway